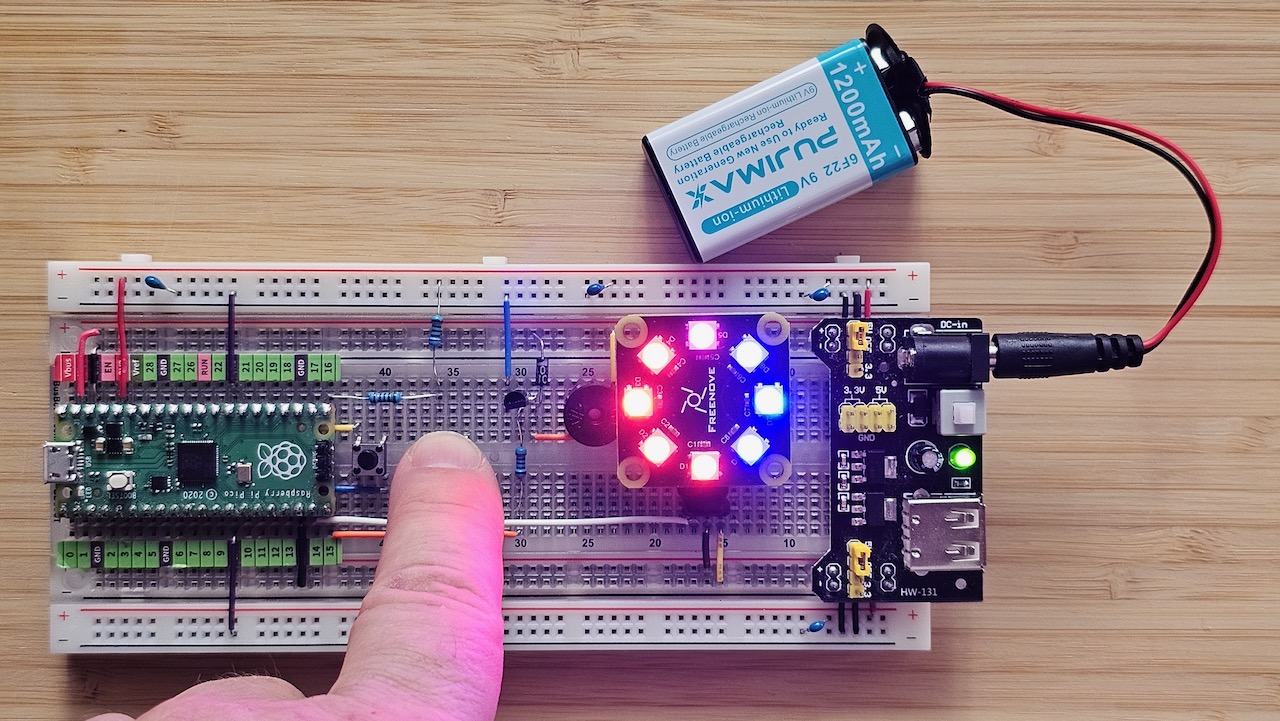
Chapter 7 Reloaded: Police Siren with Flashing Lights
Table of Contents
| Link | Purpose |
|---|---|
| 7. Chapter Buzzer | Freenove’s official C version – Chapter 7 Buzzer |
| Chapter 7 Buzzer - Starter Kit for Pico | Freenove’s official video description |
| Alire crate | Alire crate containing the Ada code in this chapter |
| GNATdoc documentation for this chapter | Automatically generated HTML documentation for the Ada code in this chapter |
Looking at the alarm siren from chapter 7 I could not help thinking: Such a siren need a flashing police light. Especially since I repaired my NeoPixel circle.
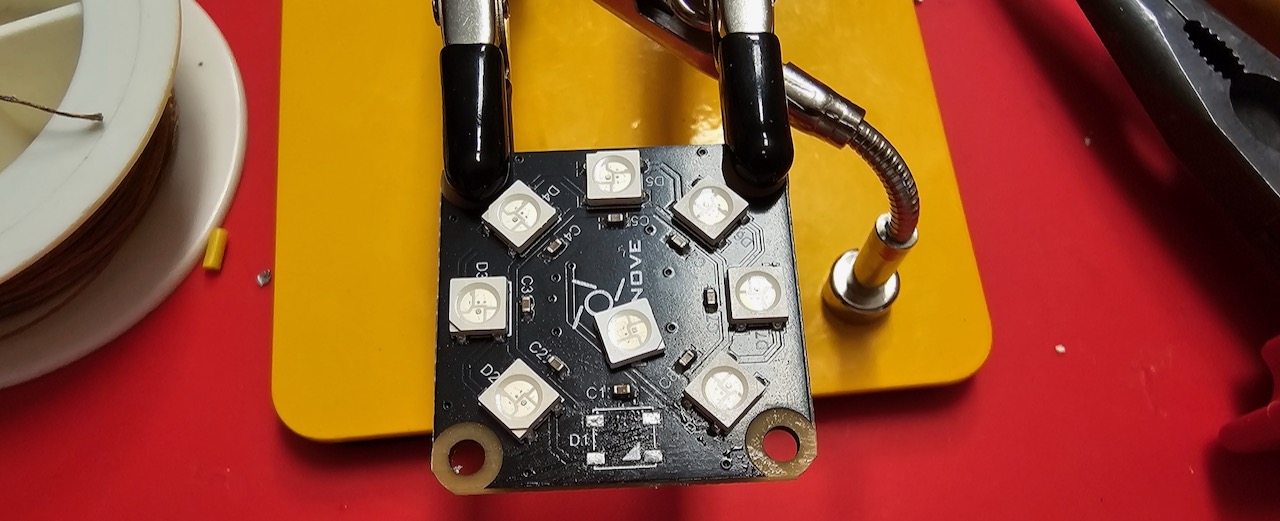
This would also be a good opportunity to teach the Jorvik profile. In addition to Ravenscar, modern Ada also supports the slightly more powerful Jorvik profile. Note that Jorvik is not a successor — Ravenscar is still needed for hard real-time.
Why Jorvik? #
In the previous chapters we used the Ravenscar profile because it guarantees deterministic, analysable behaviour for safety-critical systems. For this reloaded siren I wanted:
- More than one entry per protected object (to handle button and initializing events cleanly).
- Relative delays (much nicer for animation loops).
- Access to
Ada.Calendarif needed later for timestamps.
Jorvik relaxes exactly those restrictions while keeping the predictability that makes Ada tasking shine on the Pico. Perfect for a fun but still well-structured project.
You declare it like this at the top of your main procedure or inside the gnat.adc file together with the other
configuration pragma:
pragma License (Modified_Gpl);
pragma Ada_2022;
pragma Extensions_Allowed (On);
pragma Profile (Jorvik);
Part 1: Package Specification #
What is a Protected Object? #
A protected object is Ada’s built-in mechanism for safe data sharing between tasks. Think of it as a monitor with these guarantees:
- Only one task can be inside a protected operation at any time (mutual exclusion).
- You can have
procedures (for updates),functions (read-only, may run in parallel), andentrys (with barriers for condition synchronisation). - The compiler and runtime handle all the locking for you — no manual mutexes, no deadlocks from forgotten unlocks.
In Ravenscar you were limited to one entry per protected object. Jorvik relaxes this, which is exactly why we use it here.
Important Jorvik reminder
Because Jorvik uses static task allocation (no dynamic task creation), you must specify which core each task runs on using theCpuaspect. The main procedure always runs on core 1. This gives us three tasks across two cores — perfect load balancing for our siren.
(Tasks themselves were introduced back in Chapter 1 Reloaded.)
buzz_and_blink.ads #
The root package specification defines the overall program layout. It contains one protected object and two dedicated tasks. Together with the main task this makes three tasks on two cores. All hardware constants and renames live here so you never need to hunt through multiple files when changing pins.
with Ada.Real_Time;
with RP.Device;
with RP.GPIO;
with RP.PIO;
with Pico;

package Buzz_And_Blink is

   Pin_Button   : RP.GPIO.GPIO_Point renames Pico.GP16;
   Pin_Buzzer   : RP.GPIO.GPIO_Point renames Pico.GP15;
   Pin_NeoPixel : RP.GPIO.GPIO_Point renames Pico.GP14;
   PIO_NeoPixel : RP.PIO.PIO_Device renames RP.Device.PIO_0;

   Idle_Wait      : constant Ada.Real_Time.Time_Span :=
                       Ada.Real_Time.To_Time_Span (0.1);
   Number_Of_LEDs : constant                         := 8;

   protected Button_State is

      --  Called once from main task when everything is initialised
      procedure Signal_System_Ready;

      --  Entry used by tasks to wait until initialisation is complete
      entry Wait_For_System_Ready;

      --  Called from button polling task (or interrupt later)
      procedure Update (Is_Pressed : in Boolean);

      --  Simple query for other tasks
      function Is_Button_Active return Boolean;

   private
      Current_State : Boolean := False;
      System_Ready  : Boolean := False;
   end Button_State;

   task Buzzer_Driver with
      Cpu => 1     --  Runs on core 1
   ;

   task NeoPixel_Driver with
      Cpu => 2     --  Runs on core 2 (yes, the RP2040 has only two cores!)
   ;

end Buzz_And_Blink;
Why this design? #
Button_Stateis the single source of truth for the button. Every task that needs to know the button state queries or waits on this protected object.Buzzer_DriverandNeoPixel_Driverrun independently on their own cores, giving us true parallelism.- The main task (core 1) only does initialisation and then monitors the button which takes the least CPU.
This is the classic Ada way: protected objects for communication, tasks for concurrency.
Part 2: The Package Body #
Why separate? #
Using separate feels a bit old-fashioned (it dates back to Ada 83), but it is incredibly useful for tightly coupled
embedded systems. It lets us split the implementation of protected objects and tasks into their own files while keeping
them logically inside the same package. This keeps the main package body tiny and makes navigation in GVim much easier.
buzz_and_blink.adb #
package body Buzz_And_Blink is

   protected body Button_State is separate;
   task body Buzzer_Driver   is separate;
   task body NeoPixel_Driver is separate;

end Buzz_And_Blink;
Simple and clean. Each separate unit lives in its own .adb file (buzz_and_blink-button_state.adb,
buzz_and_blink-buzzer_driver.adb, etc.).
Part 3: The Main Task and Exception Handling #
The main procedure is always a parameterless procedure outside any package (or at least visible at root level). However,
it can live inside a child package — which is exactly what I did here (Buzz_And_Blink.Main). This keeps the entire
program neatly inside one logical unit.
Because we are using the Jorvik profile on the embedded_rp2040 runtime we can add a proper exception handler with debug output. Very useful when things go wrong on the bare metal.
buzz_and_blink-main.adb #
with Ada.Exceptions;
with Ada.Real_Time;
with Pico.UART_IO;

procedure Buzz_And_Blink.Main with
   No_Return
is
   use type Ada.Real_Time.Time_Span;
   use type Ada.Real_Time.Time;

   pragma Debug (Pico.UART_IO.Initialise);
   pragma Debug (Pico.UART_IO.Put_Line ("+ Buzz_And_Blink.Main"));

   Next : Ada.Real_Time.Time := Ada.Real_Time.Clock;
begin
   pragma Debug (Pico.UART_IO.Put_Line ("> Initialising Main"));

   --  Tell all tasks that initialisation is complete
   Button_State.Signal_System_Ready;

   pragma Debug (Pico.UART_IO.Put_Line ("> Starting main loop"));

   loop
      --  Poll the button and update the protected object
      Button_State.Update (not Pin_Button.Get);

      Next := @ + Idle_Wait;
      delay until Next;
   end loop;

exception
   when E : others =>
      pragma Debug (Pico.UART_IO.Put_Line ("=== UNHANDLED EXCEPTION ==="));
      pragma Debug (Pico.UART_IO.Put_Line (Ada.Exceptions.Exception_Name (E)));
      pragma Debug (Pico.UART_IO.Put_Line (Ada.Exceptions.Exception_Message (E)));
      pragma Debug (Pico.UART_IO.Put_Line ("- Buzz_And_Blink.Main"));
      raise;
end Buzz_And_Blink.Main;
Logging Output Example #
Here is the kind of output you will see on the serial console when everything starts up correctly:
+ Buzz_And_Blink.Main
> Initialising Main
+ Signal_System_Ready
- Signal_System_Ready
= Wait_For_System_Ready
> Starting main loop
+ Buzz_And_Blink.NeoPixel_Driver
= Wait_For_System_Ready
> Initialising NeoPixel strip
+ Buzz_And_Blink.Buzzer_Driver
> Initialising buzzer
> Starting buzzer loop
> Starting NeoPixel loop
This kind of logging is invaluable in multi-tasking applications. You can instantly see the order of execution and spot any deadlocks or initialisation races.
Part 4: The Protected Object Button_State #
I once spent three-quarters of an hour watching a YouTube video about “multi-core race-condition-safe inter-task communication in C”. It was fascinating — in a slightly horrifying way. Two layers of semaphores, carefully placed memory barriers, volatile flags, atomic operations… and the resulting code looked like it had been through a blender. One small mistake and your program would deadlock or corrupt data at the worst possible moment.
Luckily, in Ada we don’t have to do any of that. Someone at AdaCore (and the Ada community before them) has already done the hard work. We just write ordinary-looking procedures, functions and entries. The compiler and runtime take care of mutual exclusion and synchronisation for us.
What is an entry? #
An entry is a special kind of protected operation that can have a barrier — a Boolean condition that must be true
before a task is allowed to enter.
- If the barrier is false, the calling task is automatically queued and suspended (no busy-waiting!).
- As soon as another task makes the barrier true, the runtime wakes up exactly one waiting task.
- You can have multiple entries in one protected object under Jorvik (Ravenscar only allowed one).
This is perfect for initialisation synchronisation: the driver tasks wait until the main task says “everything is ready” without any polling or extra flags.
buzz_and_blink-button_state.adb #
separate (Buzz_And_Blink)
protected body Button_State is

   --  =========================================
   --  Called from the main task every 100 ms
   --  =========================================
   procedure Update (Is_Pressed : in Boolean) is
   begin
      Current_State := Is_Pressed;
   end Update;

   --  =========================================
   --  Simple read-only query (can be called
   --  concurrently with other functions)
   --  =========================================
   function Is_Button_Active return Boolean is
   begin
      return Current_State;
   end Is_Button_Active;

   --  =========================================
   --  Called once by the main task after
   --  hardware initialisation
   --  =========================================
   procedure Signal_System_Ready is
      pragma Debug (Pico.UART_IO.Put_Line ("+ Signal_System_Ready"));
   begin
      System_Ready := True;

      pragma Debug (Pico.UART_IO.Put_Line ("- Signal_System_Ready"));
   end Signal_System_Ready;

   --  =========================================
   --  Entry with barrier. Tasks wait here until
   --  the system is fully initialised.
   --  =========================================
   entry Wait_For_System_Ready when System_Ready is
   begin
      pragma Debug (Pico.UART_IO.Put_Line ("= Wait_For_System_Ready"));
   end Wait_For_System_Ready;

end Button_State;
Why this feels so natural #
Look how little code is needed. No mutexes, no condition variables, no manual locking. Just normal Ada control flow. The protected object guarantees that:
- Only one task is inside at any time.
- The barrier on
Wait_For_System_Readydoes the waiting and waking automatically. Is_Button_Activecan be called safely from multiple tasks at the same time.
This is the kind of thing that makes me smile every time I write Ada on the Pico.
Part 5: The Buzzer Driver Task #
The protected object and the original single-task siren were almost identical to pwm_alert.adb from the first version
of Chapter 7. That is one of the things I love about Ada — the syntax stays beautifully consistent. There are no weird
semantic jumps or “now everything is different” moments like you sometimes get in other languages (I am looking at you,
Scala). A procedure becomes a task body and the rest just flows naturally.
Here is the complete task body with all the improvements.
buzz_and_blink-buzzer_driver.adb #
--  =============================================
--  Buzzer driver task — runs on core 1
--  Chapter 7 Reloaded, Part 6
--
--  Author: Martin Krischik
--  =============================================

with Ada.Numerics.Elementary_Functions;
with Ada.Exceptions;
with Pico.Tone;
with Pico.UART_IO;
with RP.PWM;

separate (Buzz_And_Blink)
task body Buzzer_Driver is

   use type Ada.Real_Time.Time_Span;
   use type Ada.Real_Time.Time;

   package Math renames Ada.Numerics.Elementary_Functions;

   --  Local copies of constants (makes code easier to read)
   PWM_Buzzer     : constant RP.PWM.PWM_Point := RP.PWM.To_PWM (Pin_Buzzer);
   Base_Frequency : constant Float             := 2_000.0;
   Delta_Frequency: constant Float             := 800.0;
   Tone_Length    : constant Duration          := 0.008;

   Next : Ada.Real_Time.Time := Ada.Real_Time.Clock;

   --  =========================================
   --  Play one short tone slice
   --  =========================================
   procedure Play_Tone (Frequency : RP.Hertz; Length : Duration) is
   begin
      pragma Debug
        (Pico.UART_IO.Put_Line
           ("Play_Tone Freq=" & Frequency'Image & " Len=" & Length'Image));

      Pico.Tone.Output (PWM_Buzzer, Frequency);

      Next := @ + Ada.Real_Time.To_Time_Span (Length);
      delay until Next;
   end Play_Tone;

   --  =========================================
   --  One full wailing cycle (same sound as before)
   --  =========================================
   procedure Alert is
      Sin_Value  : Float     := 0.0;
      Tone_Value : RP.Hertz;
      X          : Natural   := 0;
   begin
      while X < 360 loop
         Sin_Value  := Math.Sin (Float (X), 360.0);
         Tone_Value := RP.Hertz (Base_Frequency + Sin_Value * Delta_Frequency);

         Play_Tone (Tone_Value, Tone_Length);

         --  Stop immediately when button is released
         exit when not Button_State.Is_Button_Active;

         X := @ + 10;
      end loop;
   end Alert;

begin
   --  Wait until main task has finished initialising everything
   Button_State.Wait_For_System_Ready;

   pragma Debug (Pico.UART_IO.Put_Line ("+ Buzz_And_Blink.Buzzer_Driver"));
   pragma Debug (Pico.UART_IO.Put_Line ("> Initialising buzzer"));

   --  Configure PWM pin once at start
   Pin_Buzzer.Configure (RP.GPIO.Output, RP.GPIO.Floating, RP.GPIO.PWM);
   RP.PWM.Initialize;

   pragma Debug (Pico.UART_IO.Put_Line ("> Starting buzzer loop"));

   loop
      if Button_State.Is_Button_Active then
         Alert;
      else
         --  Silence and give CPU time to the other core
         Pico.Tone.Output (PWM_Buzzer, 0);

         Next := @ + Idle_Wait;
         delay until Next;
      end if;
   end loop;

exception
   when E : others =>
      pragma Debug (Pico.UART_IO.Put_Line ("=== UNHANDLED EXCEPTION ==="));
      pragma Debug (Pico.UART_IO.Put_Line (Ada.Exceptions.Exception_Name (E)));
      pragma Debug (Pico.UART_IO.Put_Line (Ada.Exceptions.Exception_Message (E)));
      pragma Debug (Pico.UART_IO.Put_Line ("- Buzz_And_Blink.Buzzer_Driver"));
      raise;
end Buzzer_Driver;
What changed and why it matters #
- Now a proper task body — runs independently on core 1.
- Button initialisation removed — that now lives only in the main task.
- Immediate stop on button release — the
exit wheninside the sine loop means the siren cuts off instantly instead of finishing the current cycle. Much more responsive. - Wait for system ready — the task blocks cleanly on the protected entry until everything is set up.
- Idle delay when inactive — all loops now use the same
Idle_Waitwhen the button is not pressed. This is friendlier to the other tasks and saves power. - Full exception handler — consistent with the main procedure and the NeoPixel task. Debugging multi-task code on bare metal is so much easier with clear log messages.
The code is now split cleanly between responsibilities, yet it remains simple and readable. Ada makes this kind of concurrency feel almost too easy.
Part 6: The NeoPixel Driver Task (Final Piece) #
We have reached the last piece of the puzzle. The NeoPixel driver task is based on the code from Chapter 6
(sketch_06_1_led_pixel.adb), but I have changed the pattern from a simple colour cycle to a smooth rotating
red-and-blue police light effect. The really clever bit is how the rotation works using a modular type — pure Ada
elegance.
buzz_and_blink-neopixel_driver.adb #
with Ada.Exceptions;
with Ada.Real_Time;
with HAL;
with Pico.UART_IO;
with RP.DMA;
with RP.Device;
with RP.GPIO;
with RP.PIO.WS2812;

separate (Buzz_And_Blink)
task body NeoPixel_Driver is
   use type Ada.Real_Time.Time_Span;
   use type Ada.Real_Time.Time;

   Number_Of_LEDs   : constant := 8;   --  ← change to your strip length
   Number_Of_Colors : constant := 8;   --  ← change to the number of different colours in your pattern

   --  RGB channels (most WS2812 strips)
   type RGB_Index is (R, G, B);

   --  Modular type for automatic rotation (the magic!)
   type Color_Index is mod Number_Of_Colors;

   type LED_Index is range 1 .. Number_Of_LEDs;

   --  One colour = array of three UInt8 values (R, G, B)
   type Color_Array is array (RGB_Index) of HAL.UInt8;

   --  Full pattern buffer: one colour per LED
   type LED_Color_Array is array (LED_Index) of Color_Array;

   --!pp off
   Siren_Pattern_8 : constant LED_Color_Array :=
     [
      [200, 0,   0],  --  0: Pure Red (Peak)
      [80,  0,   0],  --  1: Dimmer Red
      [30,  0,  30],  --  2: Dim Purple (Border)
      [0,   0,  80],  --  3: Dimmer Blue
      [0,   0, 200],  --  4: Pure Blue (Peak)
      [0,   0,  80],  --  5: Dimmer Blue
      [30,  0,  30],  --  6: Dim Purple (Border)
      [80,  0,   0]   --  7: Dimmer Red
     ];
   --!pp on

   Strip          : RP.PIO.WS2812.Strip
                      (Pin_NeoPixel'Access,
                       PIO_NeoPixel'Access,
                       SM => 0,
                       Number_Of_LEDs => 8);
   Color_Position : Color_Index                      := 0;
   Hold_Period    : constant Ada.Real_Time.Time_Span :=
                       Ada.Real_Time.To_Time_Span (0.05);
   Next : Ada.Real_Time.Time := Ada.Real_Time.Clock;
begin
   --  Wait until the main task has finished hardware setup
   Button_State.Wait_For_System_Ready;

   pragma Debug (Pico.UART_IO.Put_Line ("+ Buzz_And_Blink.NeoPixel_Driver"));
   pragma Debug (Pico.UART_IO.Put_Line ("> Initialising NeoPixel strip"));

   RP.DMA.Enable;
   PIO_NeoPixel.Enable;
   Strip.Initialize;
   Strip.Enable_DMA (Chan => 0);
   Strip.Clear;
   Strip.Update (Blocking => True);

   pragma Debug (Pico.UART_IO.Put_Line ("> Starting NeoPixel loop"));

   loop
      if Button_State.Is_Button_Active then
         --  Rotating police light pattern
         for I in LED_Index'Range loop
            declare
               --  This single line does all the modular rotation magic
               J : constant LED_Index :=
                     LED_Index (Color_Index (I - 1) + Color_Position) + 1;
            begin
               Strip.Set_RGB
                 (Integer (I),
                  Siren_Pattern_8 (J) (R),
                  Siren_Pattern_8 (J) (G),
                  Siren_Pattern_8 (J) (B));
            end;
         end loop;

         Strip.Update;

         Next := @ + Hold_Period;
         delay until Next;

         Color_Position := @ + 1;   --  rotates the pattern one step

      else
         --  Button released → lights off
         Strip.Clear;
         Strip.Update;
         Color_Position := 0;

         Next := @ + Idle_Wait;
         delay until Next;
      end if;
   end loop;

exception
   when E : others =>
      pragma Debug (Pico.UART_IO.Put_Line ("=== UNHANDLED EXCEPTION ==="));
      pragma Debug (Pico.UART_IO.Put_Line (Ada.Exceptions.Exception_Name (E)));
      pragma Debug (Pico.UART_IO.Put_Line (Ada.Exceptions.Exception_Message (E)));
      pragma Debug (Pico.UART_IO.Put_Line ("- Buzz_And_Blink.NeoPixel_Driver"));
      raise;
end NeoPixel_Driver;
The Modular Arithmetic Magic Explained #
The line that makes the pattern rotate so smoothly is this one:
J : constant LED_Index :=
      LED_Index (Color_Index (I - 1) + Color_Position) + 1;
Here is what happens step by step:
Color_Indexis a modular type (mod 8). Adding values automatically wraps around — noifstatements ormodoperators needed.Color_Index (I - 1)converts the LED number (0-based) into the modular type.- We add the current
Color_Position— this shifts the whole pattern. - Convert back to
LED_Indexand add 1 (because our array starts at 1).
Because of the modular arithmetic, when Color_Position reaches 8 it becomes 0 again — perfect endless rotation with
zero extra code. This is the kind of small but beautiful detail that makes Ada such a joy for embedded work.
Summary of Changes from Chapter 6 #
- Runs as an independent task on core 2
- Synchronised start via protected entry
- Rotating red/blue police pattern instead of static colours
- Same idle delay as the other tasks for better multi-core behaviour
- Full exception logging
And that is the complete multi-task police siren! Three tasks, one protected object, clean synchronisation, and rock-solid real-time behaviour on the RP2040 under the Jorvik profile.
I hope you enjoy building and extending it as much as I did writing it. The next chapter will return to the main tutorial thread with proper USB serial and logging.